Preparing and braiding rawhide onto a handleby Julia McCormack - McCormack Hill Leatherwww.mhleather.com | |
Preparation of the rawhide string: | |
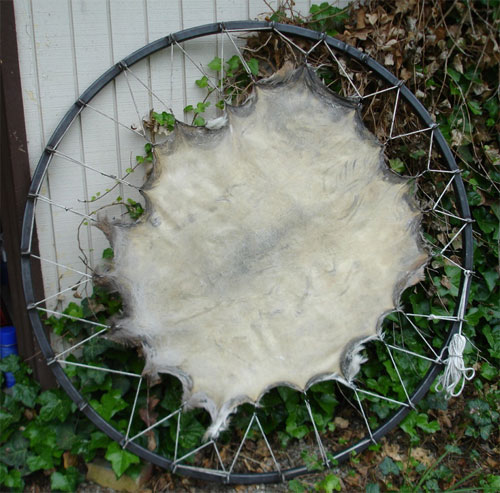 |
This is a stretched, fleshed, de-haired deer rawhide, dried into a hard, thin disk and ready to be cut into a single, long, 3/8" wide string. I get the deer hides from local hunters and they are so small that they don't go very far (so I save them for special stuff); the rawhide I use the braid the knife handles is cow rawhide that I get already dried and cut into a 30" circular disk, which I then cut into a long string just like the dried deer rawhide. |
 |
Here I am beginning to cut the disk into one long string. |
 |
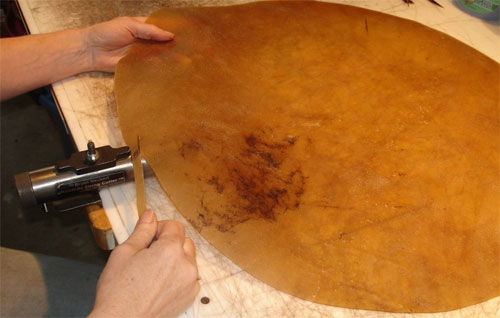
Almost at the end. The string is wavy now, being a straight string cut from a circle, so I'll soak it in water for a half-hour, then wrap it in plastic to sit overnight and "case" (absorb and distribute the moisture evenly). Once it has a consistent, pliable feel (not too wet, not too dry) I will stretch it to make it straight and then cut it again. |
 |
The long string (about 185 ft) I cut from the circular disc is then cut one more time in the string cutter to make it perfectly uniform in width |
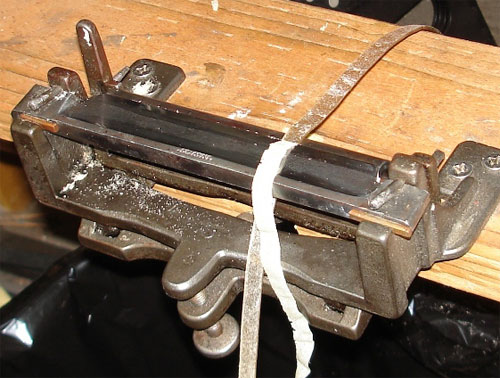 |
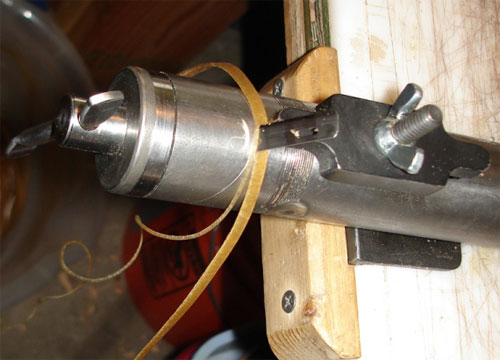
The entire string is passed 5 to 6 times through this splitter, shaving off translucent slices of the flesh side to make it an even thickness, and then to get it thinned to the thickness I want (2/64" to 3/64"); when working with rawhide, it must be constantly maintained at a specific dampness so that it is moist enough to cut easily but not so moist that it stretches. As it is split thinner, it dries out faster and must be periodically wet down and put in plastic for a few hours to "case" and become pliable and workable again. |
 |
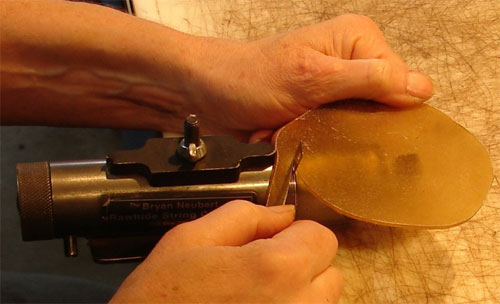
One more cut: After the string is split as thin as I want it, I cut it one more time. Here I am cutting it in half, to get the finished width I want to braid with, and to get twice as much string from the original disk (now I have 2 strings of 185 ft each). |
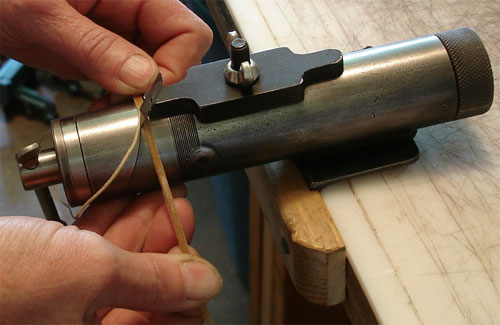 |
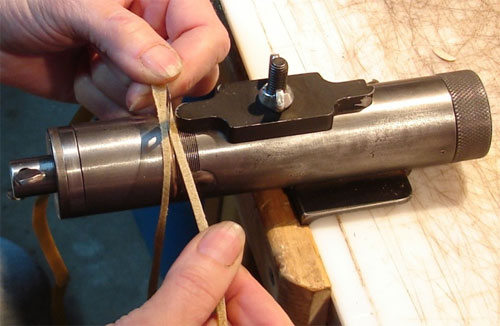
The last stage in string prep is to bevel the edges on the hair side (the smooth, shiny, "top" side) because if the edges are not
rounded by beveling, they can be wicked sharp after the rawhide dries. To bevel, the string is pulled through the cutter under a blade
that's fixed at an angle to knock the corner off. I use old fashioned single edge injectable razor blades because they are so sharp, and it takes a scary sharp blade to cut rawhide cleanly (I go through a lot of them because even the best tempered rawhide chews them up like candy). |
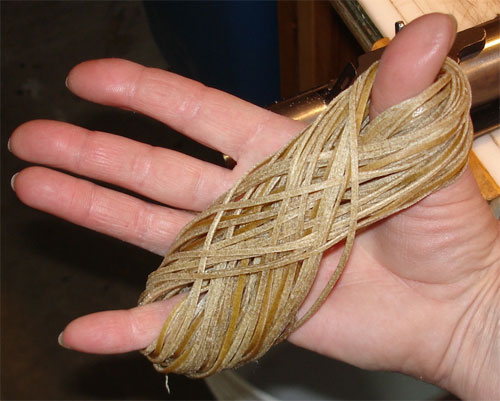 |
Finally! Braidable rawhide string! When all this is finished, the prepared string is wet down again, put in plastic, and put in the refrigerator until I'm ready to cut off a length and braid something. |
Braiding a knife handle: | |
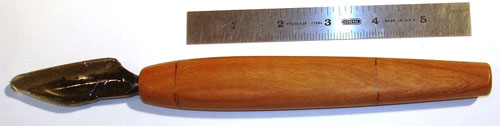 |
To begin, "measure three times, mark twice, cut once" |
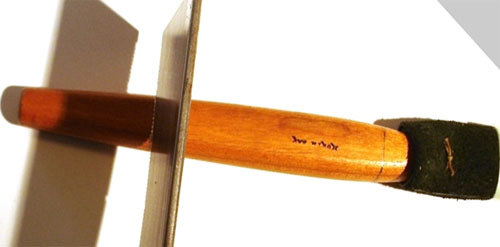 |
Sawing neat endstops with a Japanese dovetail saw |
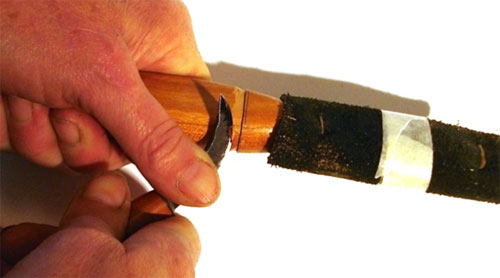 |
Carefully chipping into the endstops with a turkey knife |
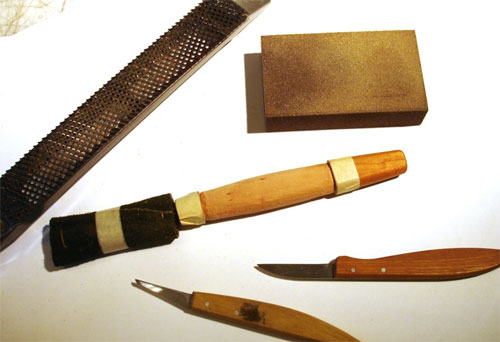 |
The carved/rasped/sanded bed, and the tools involved |
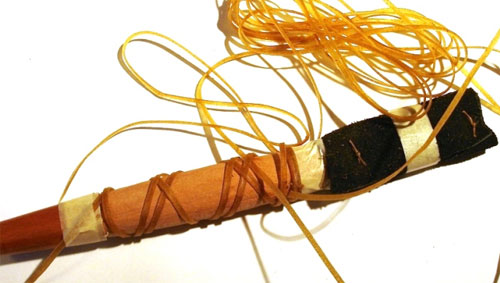 |
Beginning to braid the "long knot". The whole knot will be braided with a single 16 foot long rawhide string at just the right dampness and temper (which must be maintained in spite of the rawhide's tendency to dry and stiffen as I braid it) |
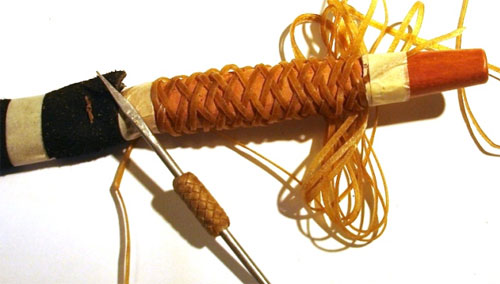 |
Halfway finished. So far, it's pretty easy |
 |
The end of the string is woven for the most part under-one-over-one in a basic braided knot; I use my homemade fid to pick up each string for the pointed end to pass under |
 |
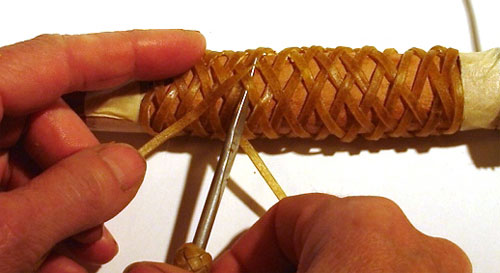
Three-quarters done; the knot requires eight passes up the length of the handle and back again ("eight bights"). This picture is six bights and this is where it starts to get interesting |
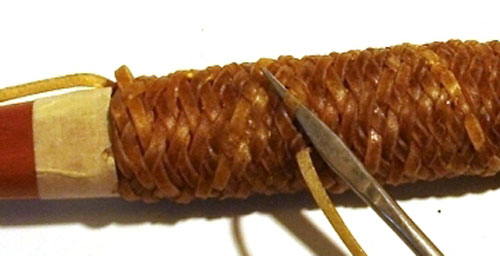 |
Nearly finished with the last pass. The braiding is tight and I'm using my high powered glasses now so I can see the correct string to pick up and pass under |
 |
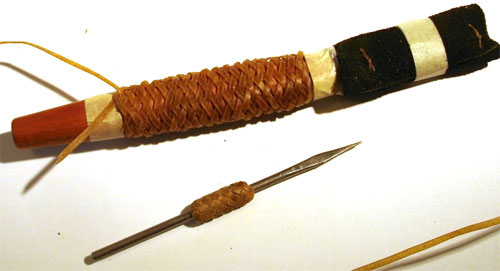
Finished, but messy |
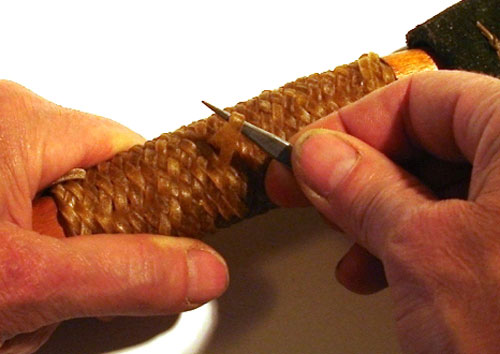 |
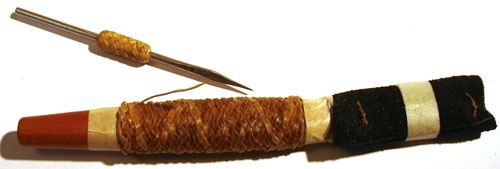
Now I go through the entire knot from beginning to end, stitch by stitch, carefully picking and snugging each stitch to take any slack out of the braid and make it all lie down smoothly. |
 |
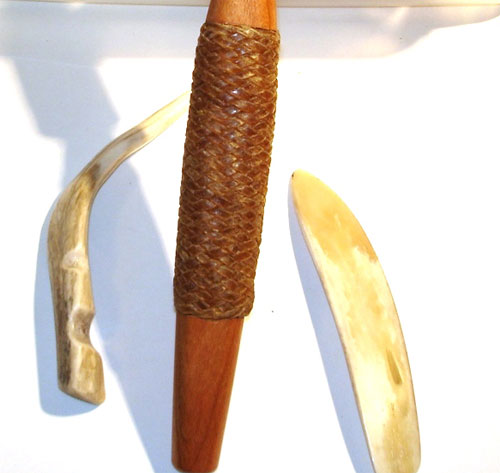
After the stitches are picked, I burnish the knot hard with a very smooth piece of bone or antler, to force the stitches to settle in together and make the surface as smooth as possible. |
 |
Almost finished. The braiding is smooth, plump, and shiny because it's still a little damp |
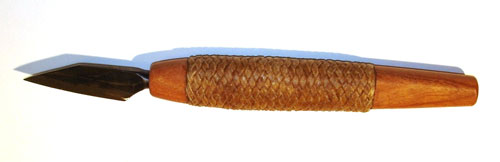 |
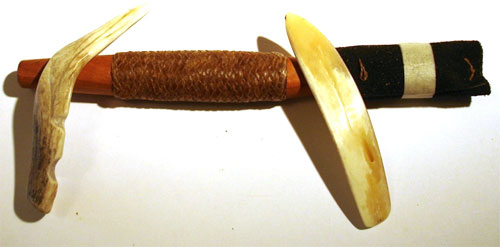
After drying overnight the rawhide has tightened a little and lost some of its shininess. Here it's been rubbed with a beeswax compound for protection and luster (and the wood has been rubbed with a different beeswax compound) and it's done. |
|
Julia McCormack McCormack Hill Leather www.mhleather.com | |